
Top 5 tips: Immunohistochemistry
21st May 2026
Immunohistochemistry looks straightforward on paper. You fix your tissue, section it, apply your antibody, add your detection reagents, and visualise. Clean result. Move on. In practice, most people who work with IHC regularly know that's not how it goes. Results are inconsistent between runs. Background appears where it shouldn't. Staining is weak even when you're sure the target is there. You change one variable and something else shifts. The frustrating part is that most of these problems trace back to the same five things. Getting these right doesn't guarantee a perfect experiment, but it removes most of the variables that cause unnecessary failure.
1. Start with a validated antibody
This sounds obvious, but it's where a surprising number of IHC problems begin. Not every antibody is designed or tested for use in IHC, and within IHC there's a meaningful difference between an antibody validated on frozen sections versus one validated on formalin-fixed, paraffin-embedded (FFPE) tissue. Formalin fixation introduces cross-links between proteins that change how epitopes are presented. An antibody that works well in Western blot or flow cytometry may not recognise its target in fixed tissue at all, or may bind non-specifically in ways that produce misleading results. Before you invest time in protocol optimisation, check whether your antibody has been tested in the specific application and tissue type you're working with. Validation data should include representative images, the tissue used, the dilution tested, and ideally the detection system. If that data isn't available from the supplier, treat the antibody as un-validated for your purposes and factor that uncertainty into your interpretation.
2. Get your antigen retrieval right
If there's one step that causes more IHC variability than any other, it's antigen retrieval. Formalin fixation protects tissue morphology, but it does so by forming methylene bridges between proteins. These cross-links mask the epitopes your antibody needs to bind. Antigen retrieval breaks those cross-links and exposes the target again. The two main approaches are heat-induced epitope retrieval (HIER) and enzymatic retrieval. HIER uses a heated buffer, typically citrate at pH 6.0 or EDTA at pH 9.0, and is the more widely used method. Enzymatic methods use proteases like proteinase K or trypsin and work better for certain antigens that don't respond well to heat retrieval. The choice of buffer, pH, temperature, and duration all affect the outcome. The same antibody can give very different results with citrate versus EDTA retrieval. Protocols in published papers or data sheets are a starting point, but your fixation time, tissue type, and even the age of your FFPE blocks can all shift what works best. If staining is weak or absent and your antibody is validated, antigen retrieval is usually the first place to look.
3. Always run controls
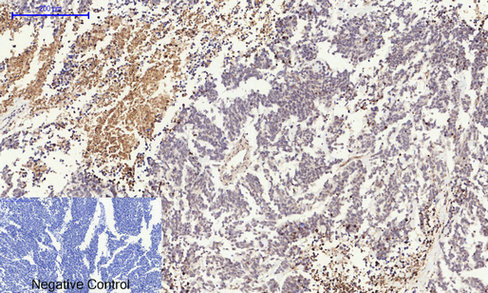
Controls are not a formality. They are how you know whether your result is real. A positive control confirms that your protocol is working. Use tissue that is known to express your target at a reliable level. If your positive control fails, your negative result in your experimental tissue means nothing. A negative control tells you whether you're seeing specific signal or background. The most useful negative control omits the primary antibody and goes through the rest of the protocol identically. Any staining you see in that condition is non-specific, and any staining in your experimental section that matches it should be treated with caution. If you're working with a new antibody, a new tissue type, or if anything in your protocol has changed, run both. Results from a single experimental section with no controls are very difficult to interpret with confidence, and if you're submitting for publication, reviewers will ask.
4. Titrate your antibody
The recommended dilution on a data sheet is exactly that: a recommendation. It's usually based on a specific tissue, a specific fixation protocol, and a specific detection system. Change any of those variables and the optimal dilution shifts. Using too high a concentration increases background. Using too low a concentration gives weak or absent signal. Neither tells you much about what's actually in your tissue. A titration experiment takes one additional day upfront and can save weeks of troubleshooting later. Test across at least a four-fold dilution range around the recommended starting point. Pair it with your positive and negative controls. Find the dilution where specific signal is clear and background is low, and lock that in before you run your experimental samples. It's worth writing this into your lab's protocol rather than rediscovering it each time someone new runs the assay.
5. Match your detection system to your setup
Secondary antibodies and detection chemistry are easy to get wrong, and the errors are not always obvious in the result. Your secondary antibody must match the host species of your primary. If your primary was raised in rabbit, you need an anti-rabbit secondary. This seems straightforward, but mistakes happen, particularly when working across multiple projects with antibodies from different suppliers. Beyond species matching, your detection system needs to suit your imaging setup. Chromogenic detection with DAB works well for bright field microscopy and is standard in many clinical and pathology settings. Fluorescent detection gives you more flexibility for multiplexing but requires the right filters and a camera system that can capture the signal clearly. If you're multiplexing, think carefully about spectral overlap. Running two targets with similar emission wavelengths causes signal bleed-through that can be very difficult to correct in analysis. Getting the detection system sorted from the start, rather than adapting it around an existing primary antibody, saves a lot of rework.
A note on antibody quality
All five of these steps assume you're working with an antibody that actually does what it says. That's not always a safe assumption. Antibody quality is inconsistent across the industry, and the consequences in research can be significant. Published studies have identified cases where antibodies widely used in IHC showed poor specificity or batch-to-batch variability that affected reproducibility.
This is why we built the IHC-Guaranteed range at St John's Laboratory Ltd. Every antibody in the range has been validated on human FFPE tissue sections under controlled conditions, with staining images available so you can see the result before you order. If an antibody in the range doesn't perform in your hands under standard IHC conditions, we'll work with you to find one that does. It doesn't remove the need to optimise your own protocol, but it removes one of the bigger variables.
Browse the IHC-Guaranteed range →
Which of these five steps has given you the most trouble in your lab? Let us know in the comments!
Related Products
IHC-validated antibodies with verified customer reviews.


